Dan sesungguhnya telah Kami berikan hikmat kepada Luqman, yaitu: "Bersyukurlah kepada Allah. Dan barangsiapa yang bersyukur (kepada Allah), maka sesungguhnya ia bersyukur untuk dirinya sendiri; dan barangsiapa yang tidak bersyukur, maka sesungguhnya Allah Maha Kaya lagi Maha Terpuji." (LUqman:12)


Showing posts with label training. Show all posts

Check on rigid pipe


By using this telescopic gauge, the thickness of the wall of the rigid tubing can be determined
Telescopic gauge with different size on its opener.
The fairing. Most of rigid tubing connections and junctions can be find through under this panels. Some of the rigid tubing assemble for hydraulic actuator, air compressor for instruments and also the fuel. More details of this HS225 aircraft can be find through the AMM.
Posted by Picasa

Fluid lines and fittings

The 2024 T3 pipe tubing is sawing and bending by using the bending tools

Using this faring tools, every open (inlet and oulet) of the tubing will be flaring. Like this tube which is 4/16 inch, the proper size to make the flaring with this flaring tools must also be compatible with that tube size.
Successful !
Posted by Picasa

Working with composite: treatment and repairing

This is what we done on the radome for composite repairing. To do this , first the crack or hole on the radome surface must be remove and sand it by using the sander . Say the hole on the radome surface is 2inches, so the repairing area (coating with the composite) should be at least 4 inches in diameter. Area in which out from the crack must be sanding off so that the layer of composite compound could be applied. The honeycomb within the crack must be removed and replace with the new one.
Sanding with using air angle sander
This is how its done- The centre, which is honeycomb is been replaced with the the new one.


After that, put the wet lay-up (consists of hardened and resin, with the ratio 1:3, combined with the fibre glass cloth and microbaloon ) to the surface of the repairing area. Put it until it is fit enough to cover the repairing area. Let it dry for almost a day(depend on the condition).

As the surface of the composite repair is dry enough, sand that area until it is smooth and shaped to the body surface , like this radome. If there is the crack or not smooth surface cause by during the wet lay-up process, put the glass fiber compound to the surface and let it dry enough. Repeat the process again.
Adding the glass fiber compound to the repairing area.
Final touch
Posted by Picasa

Cable splicing- nicopress methods ...


Have you seen this type of cable before? This is the cables with different termination technique for the purpose of connecting the cable controls in aircraft. They are fit , durable and could maintain to full cable strength. To do this, things must be have is like cable cutter, gono-go gauge, caliper, nicopress sleeve and tools, and pliers also.


The center of the compression made first(with this tools) , then the compression nearest to thimble , and finally the compression at the end of the sleeve . After all the 3 compressions made, they are checked with special gauge. If they are properly made, the sleeve exactly fit the slot.
Cable that has been cut then goes to other process- swaging and nicopress

More details can be pursuit here


Front landing Gears : assembling disassemble

Read INstructions, what have to do and don't must be understood clearly


All components, including shaft, castle nuts, circlips , threaded rod(stud) and roller bearing, retainer ring, male and female wheel half presented on table.
The product manufacturer, psi of the tyre and tyre specs printed on the each side of a tyre.
Wheel with part number
Shock absorber
Finally
Posted by Picasa

6th July, TUDM Open day 2010 in Subang

We've been given task of to try on the new simulator in Subang. Basically the simulator that we used are come up with many good stuff like joystick, control panel, CPU, big LCD screen and more importantly, use microsoft flight simulator as a platform to simulate the aircraft flying onto the screen. Surely, this is as a part of ceremony by the Panglima Tentra Udara that came visit us during that test in the room, near or next to TUDM hangar .Amazingly, the test for this simulator is alongside to the event of TUDM open day
Me, among 1st MIAT student able to fly 737 and Cessna on big screen that day.
Parachute jump
It's antitank misslile, I think
Posted by Picasa

Access panel& blind rivet riverting


Equipment used
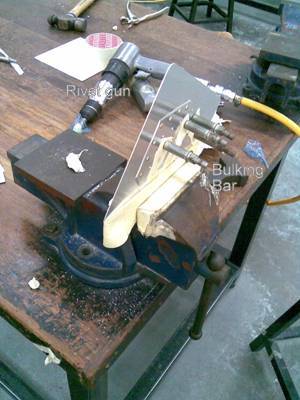
Bucking bar, Various File, Prick Punch, Hammer, Center Punch, Hammer, Burring tools, Cleco, Countersink, Lead Pencil/Marker, Deburring tool, Aviation Snips, ScalePneumatic drill, Cleco pier, Aluminium Sheet, Rivet Gun, Combination Square, Dividers, Rivet sets, Rivet, Rivet Gauge, Scale

b. Given
1. Material 2024 T3 0.032” [a. Skin(5.5”x 6.0”) b. Doublers(4.5”x 5”) c. Access panel(3.5”x4”) d. Metal sheet Strip(5.5”x0.75”)], Anchor nuts and screws MS21059L3& NAS603-6P 4 sets ,Rivet MS20426AD3-3; 32 rivets, Edge Distance ¼”, Rivet Pitch ½”, Cherry Max ; 3sets(Universal CR3213-4-02&CountersunkCR3212-4-02 1/8” )

Procedure:
1st, the sheet metal layout is transferred (exactly the same in the figure above) with all the metals separated from each other. Something have to be sure is that rivet pitches and edge distances is follow the AC43.13 1B/2A/ a/c repair manual/SRM procedures.

After that skin is taken and cut to the required hole for the access.File and deburr the hole to size. The rivet positions is marked with the center punch , drill thru it and holes get deburred.
Doublers(4 ½ “ x 5”) be taken and cut to the required hole size. The doublers must be place at the back of the skin and drill it thru the holes of the doublers. As the drill is finished, use cleco. Cleco are used to hold both pieces together firmly.


Use anchor nut to mark the holes . How we do?-palace and secure it to the piece, that’s all….

Em, another piece of metal with the size of (3 ½ “ x 4”) are to be cut, file and trimmed. This then should be used for access door on the combined sheet metal.
Ok, now the the best part itself- coating the Alodine(use for preventing the corrosion). Clean it and dry it for half an hour.


By using the given machined screws, close the access door.
Now, the last part of sheet metal- the bottom metal sheet strip must be mark at the desired holes for the Cherry max installation. As you already see here, there are two types of Cherrymax rivets -3 countersunk and 4 universal heads) installed by using the pop rivet gun.

Posted by Picasa

Safety wire, check on corrosion applied...

Last Thursday, we have training on safety wire and corrosin check on the aircraft in the hangar. The instructor, Hj. Megat have divide members of easa4 into small groups. Each group with 4 members have to check wether the parts in the airplane or helicopter like safety wire have to be replace or not. If none of that things can be find, then other parts must be resolve- find the corrosion parts, clean and fix it.

My group, have checking on boeing727 left landing gear and we found 2parts -turnbuckles. That turnbuckles safety wiring must be replaced with the new one .The tools that we used is safety wiring pliers, long nose pliers. The wire for turnbuckles that we used is wire 1/32 inch diameter.


Making the safety wiring on pipes connector


Helicopter- Check the corrosion,Clean and reinstall the push pull rod and chains back to its place

Next day, we have made check on the jackscrew whether the jack screw have the corrosion or not. We open on each part and check any suspicious or dent on the gear of the jackscrew. Oh ya, know the jackscrew? It’s the moving part(connect to the hydraulic pump through the lever ) that does make elevator or flaps moving up or down depending on the aircraft. The a/c that my team does it is on the HS125.


Gear that connect to the gear box of the jackscrew.
Posted by Picasa

Flush patch


2. flush patch-

Tools-same as to what we need for surface patch.

What we do;
Calculate ed,rd,nr n rl. Cut the sheet metal following the diagram of flush metal on a piece of sheet that patched onto that surface. Filling it, (Note:make the center punch befor drill) make a hole, (the plug and skin) with diameter of 3/32 inch. On the skin, make countersunk with using the countersink drill. Then rivet both skin and patch. At the center, rivet the plug onto the patch.

Once finished, clean the flush patch with the soap. Soak it in the alodine to prevent it from corrosion for 5 minutes. Clean the flush patch with water and dried it well


The skin countersink is looks like 'flower'- does happen because of unpropagated adjustment and maintaining the countersinking drills to the skin.

Once finished, clean the flush patch with the soap. Soak it in the alodine to prevent it from corrosion for 5 minutes. Clean the flush patch with water and dried it well

Next---> will be Door Access panel
Posted by Picasa

Surface patch


1.Surface patch====

what we need;

universal rivet ms470, sketch of the patch and panel, sand paper, tools; rivet gun with straight sets, deburring tools, gleco, filling tools ,bucking bars, fastener pliers

what we do;

calculate the rivert including Ed(edge distance), Rd( rivet diameter),Nr(no of rivet),rl(rivet length).Then sketch onto the sheet of paper, make the photocopy, patch it onto the 2024 sheet metal. When done cut it through its size and shape of the patch and skins.

Filling the edge of the sheet metal, make the hole for the riveting on both skins and patch. Gleco by using sheet fastener pliers.

Cut the bottom of the rivet by using the rivet cutter. Say if the rd which is 3/32 so must add 2 plies of bottom steel of the rivet cutter to make it cut and firm to the patch and skin . Put that rivet into the hole of patch and skins and begin to riveting by using rivet gun and bucking bars. The shop head that was shaped from the pressed of bucking bars must be ½ to the original length of the rivet (that is the length of the rivet behind the panel).


Next----> will be on flush patch next time
Posted by Picasa

Twitt~

Piratz | More Than Just A Blog wearemusleem PORTAL ISLAM

MY links

Have my patch to your blogs. and enjoy :)